How To Use Jumper Cables: A Complete Guide For Every Driver
So, you're out on the road, and your car decides it's had enough. Dead battery vibes strike again. Don’t panic—this happens to the best of us. Knowing how to use jumper cables can save the day and get you back on track in no time. Whether you're a seasoned driver or a newbie, having this skill under your belt is crucial. Dead batteries don’t care if you’re late for work or stuck in the middle of nowhere. But hey, with the right tools and knowledge, you’ve got this in the bag.
Let’s face it, car problems are inevitable. And when your car battery dies, it’s not just inconvenient—it’s frustrating. But here’s the good news: jumper cables are your knight in shining armor. They’re affordable, easy to use, and can be a lifesaver in moments of despair. In this guide, we’ll walk you through everything you need to know about using jumper cables safely and effectively.
This isn’t just about fixing a dead battery; it’s about empowering you to handle emergencies with confidence. Whether you’re trying to help someone else or save yourself from a sticky situation, understanding how to use jumper cables is a skill that every driver should have. So, buckle up, and let’s dive into the world of jumper cables!
Read also:Why Hyatt Place Sugar Land Tx Is The Ultimate Staycation Spot
Understanding Jumper Cables and Their Importance
Jumper cables might seem like a simple piece of equipment, but they’re more than just wires with clips. They’re your go-to tool when your car battery decides to take a nap. But what exactly are jumper cables, and why are they so important? Let’s break it down.
Jumper cables are heavy-duty wires designed to transfer electrical power from a working car battery to a dead one. They come in various lengths and thicknesses, but the most common ones are about 10 to 20 feet long. The thickness, or gauge, is also important—thicker cables can handle more current, making them ideal for larger vehicles.
Here’s the deal: jumper cables aren’t just for convenience; they’re for safety. A dead battery can leave you stranded, and in some cases, in dangerous situations. Having jumper cables in your car is like having a backup plan. Plus, they’re super easy to store and won’t take up much space. So, whether you’re driving a compact car or a massive truck, jumper cables are a must-have.
Types of Jumper Cables: Which One Should You Choose?
Not all jumper cables are created equal. When shopping for a pair, you’ll notice that there are different types and specifications. Here’s a quick rundown:
- Gauge Size: The lower the gauge number, the thicker the cable. For example, 4-gauge cables are thicker and can handle more power than 8-gauge cables. If you drive a large vehicle, go for a lower gauge.
- Length: Longer cables give you more flexibility, but they can also reduce the amount of power transferred. A 10-20 foot cable is usually a good balance.
- Clamps: Look for cables with sturdy, rust-resistant clamps. These will ensure a secure connection and prevent corrosion over time.
Choosing the right jumper cables depends on your vehicle and your needs. If you’re unsure, consult your car’s manual or ask a professional for advice. Trust us, it’s worth the investment.
Step-by-Step Guide: How to Use Jumper Cables
Now that you know why jumper cables are important, let’s get into the nitty-gritty of how to use them. Follow these steps carefully to ensure a safe and successful jump-start.
Read also:Steve Dulcich Family A Closer Look At The Man Behind The Scenes
Preparation: Setting the Stage
Before you start connecting the cables, there are a few things you need to do:
- Park both cars close enough so the cables can reach, but make sure they don’t touch.
- Turn off both engines and remove the keys from the ignition.
- Engage the parking brakes and put both cars in neutral (or park for automatics).
These steps might seem obvious, but they’re crucial for safety. You don’t want any unnecessary sparks or accidents while jump-starting your car.
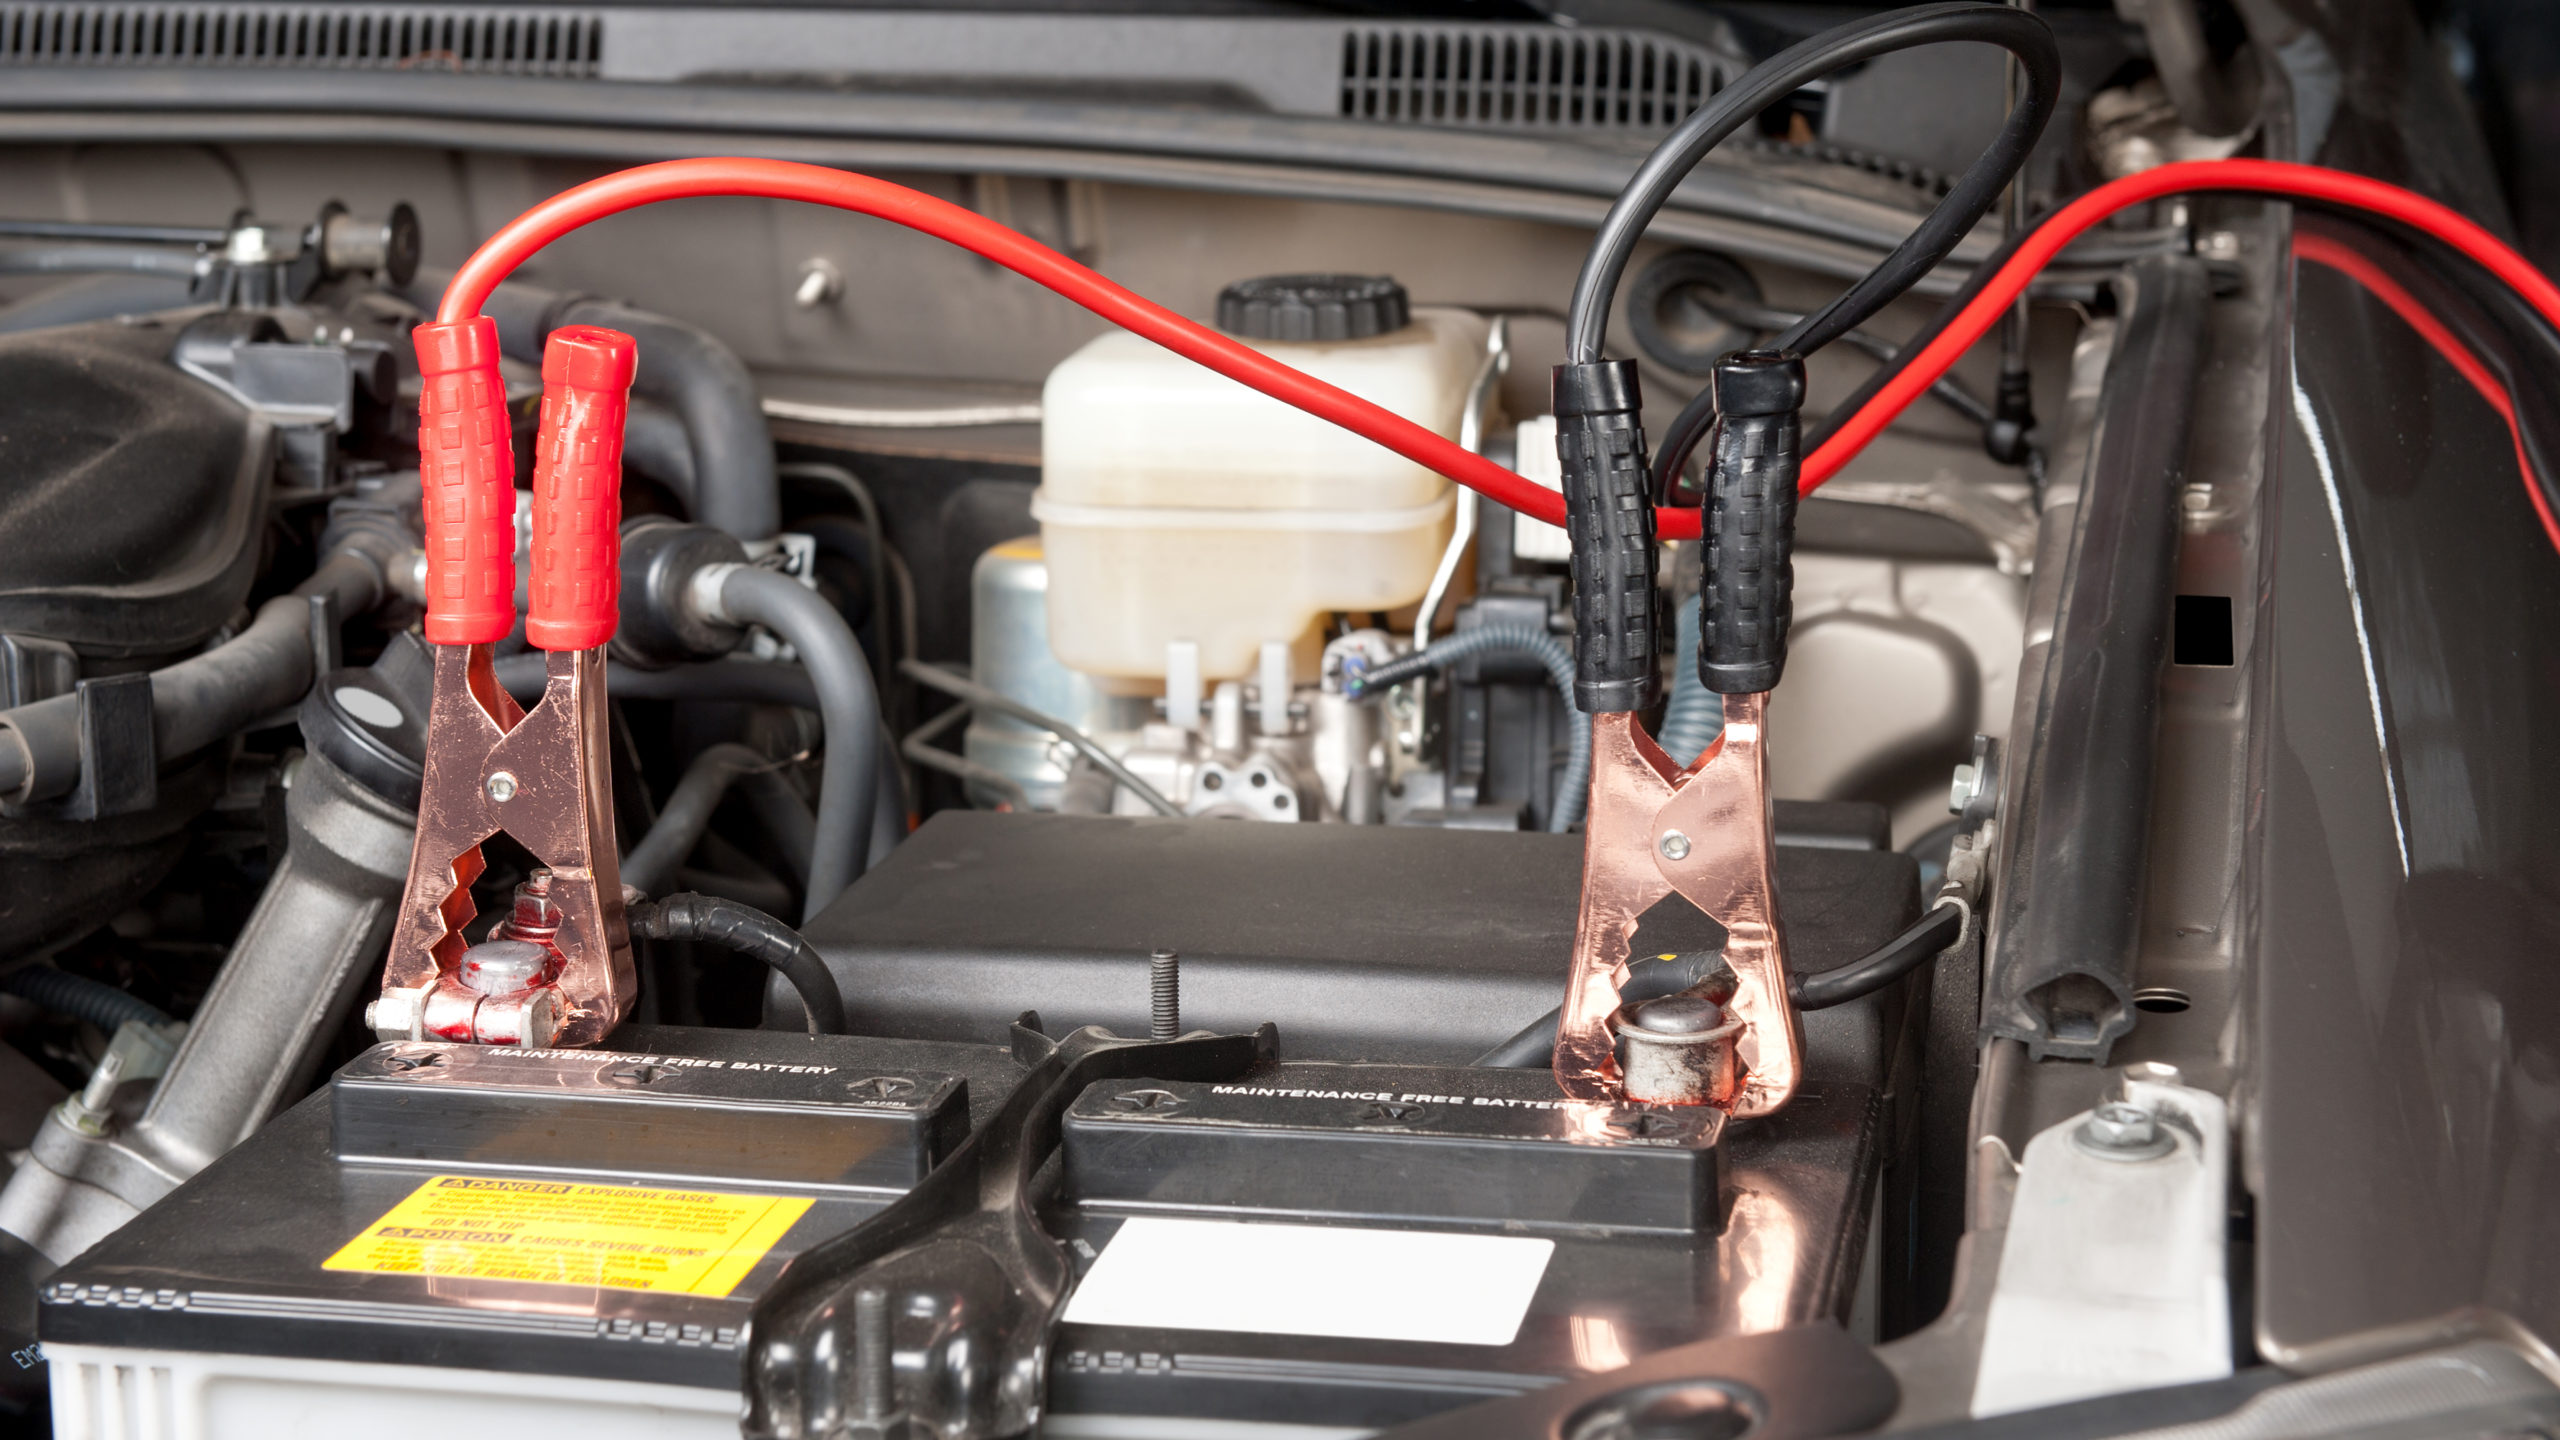
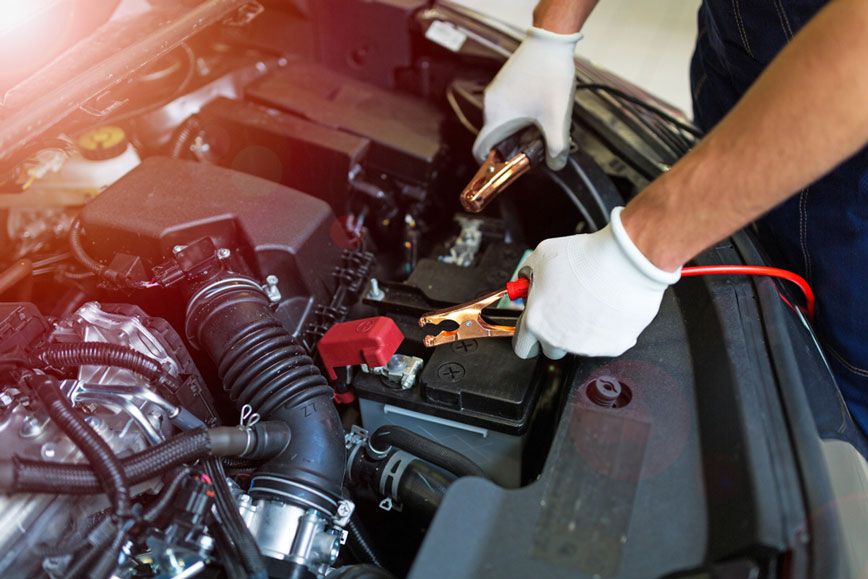
Connecting the Cables: The Right Order Matters
Here’s where the magic happens. Follow this order to connect the jumper cables:
- Attach the red clamp to the positive (+) terminal of the dead battery.
- Attach the other red clamp to the positive (+) terminal of the working battery.
- Attach the black clamp to the negative (-) terminal of the working battery.
- Finally, attach the other black clamp to an unpainted metal surface on the dead car’s engine block. This is called grounding, and it prevents sparks near the battery.
Remember, the order is crucial. Connecting the cables in the wrong sequence can cause sparks, damage the batteries, or even start a fire. Take your time and double-check each connection before moving on.
Safety First: Tips for Using Jumper Cables
Jump-starting a car might seem straightforward, but it’s not without risks. Here are some safety tips to keep in mind:
- Wear safety goggles to protect your eyes from sparks or battery acid.
- Keep the clamps away from each other once they’re connected to the batteries.
- Avoid smoking or using open flames near the cars while jump-starting.
- Never touch the metal parts of the clamps with your bare hands while they’re connected.
Safety should always be your top priority. A little caution can go a long way in preventing accidents and injuries.
Common Mistakes to Avoid
Even the most experienced drivers can make mistakes when using jumper cables. Here are a few to watch out for:
- Connecting the black clamp to the negative terminal of the dead battery instead of grounding it.
- Forgetting to turn off both cars before connecting the cables.
- Jump-starting a car with a frozen battery, which can cause it to explode.
By avoiding these common pitfalls, you’ll ensure a smoother and safer jump-starting process.
What to Do After Jump-Starting Your Car
Once your car is up and running again, it’s not time to celebrate just yet. There are a few more steps to follow:
Start the working car first and let it run for a few minutes. This will give the dead battery a chance to charge. Then, try starting the dead car. If it starts, congratulations—you’ve successfully jump-started your car! But if it doesn’t, there might be a deeper issue with the battery or alternator.
After both cars are running, remove the cables in the reverse order you connected them. Be careful not to let the clamps touch each other or any metal surfaces while they’re still connected to the batteries.
Testing the Battery: Is It Fully Charged?
Once you’ve jump-started your car, it’s a good idea to test the battery to see if it’s holding a charge. You can use a multimeter to check the voltage. A fully charged battery should read around 12.6 volts. If it’s below 12 volts, it might need to be replaced.
Additionally, take your car for a short drive to help the alternator charge the battery further. If the battery dies again soon after, it’s time to visit a mechanic.
When Not to Use Jumper Cables
While jumper cables are a lifesaver in many situations, there are times when they won’t work. Here are a few scenarios where you should avoid using jumper cables:
- If the battery is cracked, leaking, or swollen, it’s unsafe to jump-start.
- If the alternator is faulty, the battery won’t hold a charge even after jump-starting.
- If the car’s electrical system has issues, jump-starting won’t solve the problem.
In these cases, it’s best to call a professional or tow the car to a repair shop. Trying to jump-start a car with a damaged battery can be dangerous and may cause further damage.
Alternatives to Jumper Cables
Did you know there are alternatives to traditional jumper cables? Portable jump starters, also known as battery packs, are becoming increasingly popular. They’re compact, easy to use, and don’t require another car to jump-start yours. Some even come with additional features like USB ports for charging your devices.
If you’re in the market for a portable jump starter, look for one with enough capacity to start your car. For most vehicles, a 1000-amp peak current should suffice. And like jumper cables, make sure it’s stored properly and fully charged when not in use.
How to Maintain Your Jumper Cables
Having jumper cables in your car is great, but they won’t do you much good if they’re not in working condition. Here’s how to keep your jumper cables in top shape:
- Store them in a cool, dry place to prevent corrosion.
- Inspect the cables and clamps regularly for signs of wear and tear.
- Clean the clamps with a wire brush if they become corroded.
Taking care of your jumper cables ensures they’ll be ready to go when you need them most. A little maintenance goes a long way in extending their lifespan.
DIY Maintenance Tips
If you’re the DIY type, here are a few tips to keep your jumper cables in pristine condition:
- Coat the clamps with petroleum jelly or silicone spray to prevent rust.
- Wrap the cables in a protective sleeve to prevent tangling and damage.
- Label the cables with red and black tags to avoid confusion in the heat of the moment.
These simple steps can save you a lot of hassle in the long run. Plus, it’s always satisfying to know you’ve taken care of your tools.
Final Thoughts: Mastering the Art of Jump-Starting
Knowing how to use jumper cables is an essential skill for every driver. It can save you from a lot of headaches and get you back on the road in no time. But remember, safety should always come first. Follow the steps carefully, avoid common mistakes, and don’t hesitate to call for help if you’re unsure.
And hey, if you haven’t already, invest in a good pair of jumper cables or a portable jump starter. You’ll thank yourself the next time your car battery decides to throw a tantrum. Whether you’re helping someone else or saving yourself, having this knowledge and equipment can make all the difference.
So, what are you waiting for? Share this guide with your friends and family, and spread the word about the importance of jumper cables. Who knows? You might just be the hero of the day when someone needs a jump-start!
Table of Contents
- Understanding Jumper Cables and Their Importance
- Types of Jumper Cables: Which One Should You Choose?
- Step-by-Step Guide: How to Use Jumper Cables
- Preparation: Setting the Stage
- Connecting the Cables: The Right Order Matters
- Safety First: Tips for Using Jumper Cables
- Common Mistakes to Avoid
- What to Do After Jump-Starting Your Car
- Testing the Battery: Is It Fully Charged?
- When Not to Use Jumper Cables
- Alternatives to Jumper Cables
- How to Maintain Your Jumper Cables
- DIY Maintenance Tips
- Final Thoughts: Mastering the Art of Jump-Starting


