How To Remotely SSH Raspberry Pi Behind Firewall On Ubuntu Server With Port Forwarding
So here we are, diving into one of the most practical topics in modern tech: remotely SSH Raspberry Pi behind firewall on Ubuntu server with port forwarding. It's not just a cool phrase; it's a game-changer for anyone managing remote systems, especially if you're running an Ubuntu server or tinkering with Raspberry Pi. Let's break it down, step by step, and make sure you're equipped with all the knowledge you need to set this up flawlessly.
First things first, SSH—Secure Shell—is your golden ticket to accessing and controlling remote devices securely. But when you throw a firewall into the mix, things can get a little tricky. That's where port forwarding comes in, acting as the bridge that connects your external network to your internal setup. Think of it as a secret tunnel that lets you access your Raspberry Pi from anywhere in the world.
This guide isn't just about theory. We'll walk you through the setup, troubleshooting, and optimization so you can confidently manage your remote Raspberry Pi from your cozy living room or even halfway around the globe. Ready? Let's dig in.
Read also:Unlock The Power Of Moverulz Your Ultimate Guide To Mastering The Game
Table of Contents
- Introduction
- What is SSH?
- Raspberry Pi Setup
- Ubuntu Server Configuration
- Firewall Challenges and Solutions
- Port Forwarding Explained
- Dealing with Dynamic IP Addresses
- Security Tips for Remote SSH
- Troubleshooting Common Issues
- Best Practices for Remote SSH
- Conclusion
What is SSH and Why Use It?
Let's start with the basics. SSH, or Secure Shell, is a cryptographic network protocol that allows you to connect securely to a remote computer over an unsecured network. It's like having a private conversation in a crowded room. Instead of shouting out commands that everyone can hear, SSH encrypts everything, keeping your data safe from prying eyes.
When it comes to remotely SSH Raspberry Pi behind firewall, SSH is your go-to method. It's reliable, secure, and supported by almost every modern operating system, including Ubuntu Server and Raspberry Pi OS. Plus, it's super easy to set up once you get the hang of it.
Why SSH is Essential for Remote Access
- Secure communication between devices
- Ability to run commands and manage files remotely
- Support for file transfers via SCP (Secure Copy Protocol)
- Compatibility with most Linux-based systems
Now that we've covered the basics, let's move on to setting up your Raspberry Pi for remote access.
Raspberry Pi Setup for Remote SSH
Your Raspberry Pi is the heart of this operation. To remotely SSH Raspberry Pi behind firewall, you'll need to ensure it's properly configured. Here's how:
Step 1: Enable SSH on Raspberry Pi
By default, SSH is disabled on Raspberry Pi OS. To enable it:
Read also:Hdhub4u 18 Your Ultimate Guide To Premium Entertainment
- Boot up your Raspberry Pi and log in.
- Open the terminal and type
sudo raspi-config. - Select "Interfacing Options" and navigate to "SSH".
- Choose "Yes" to enable SSH and reboot your Pi.
Step 2: Find Your Pi's IP Address
You'll need the local IP address of your Raspberry Pi. Run hostname -I in the terminal to get it. This IP is crucial for setting up port forwarding later on.
Configuring Ubuntu Server for Remote SSH
Now that your Raspberry Pi is ready, it's time to focus on the Ubuntu server. Your server will act as the gateway for accessing your Pi from outside your local network.
Step 1: Install SSH on Ubuntu
Most Ubuntu installations come with SSH pre-installed, but it's always good to double-check:
- Open the terminal on your Ubuntu server.
- Type
sudo apt updateand thensudo apt install openssh-server. - Verify the installation by running
systemctl status ssh.
Step 2: Configure SSH Settings
You can tweak SSH settings by editing the config file:
- Open
/etc/ssh/sshd_configwith your favorite text editor. - Look for lines like
Port 22,PermitRootLogin no, andPasswordAuthentication no. - Save the file and restart SSH with
sudo systemctl restart ssh.
Firewall Challenges and Solutions
Firewalls are great for security, but they can be a real pain when you're trying to remotely SSH Raspberry Pi behind firewall. Here's how to handle them:
Understanding Firewalls
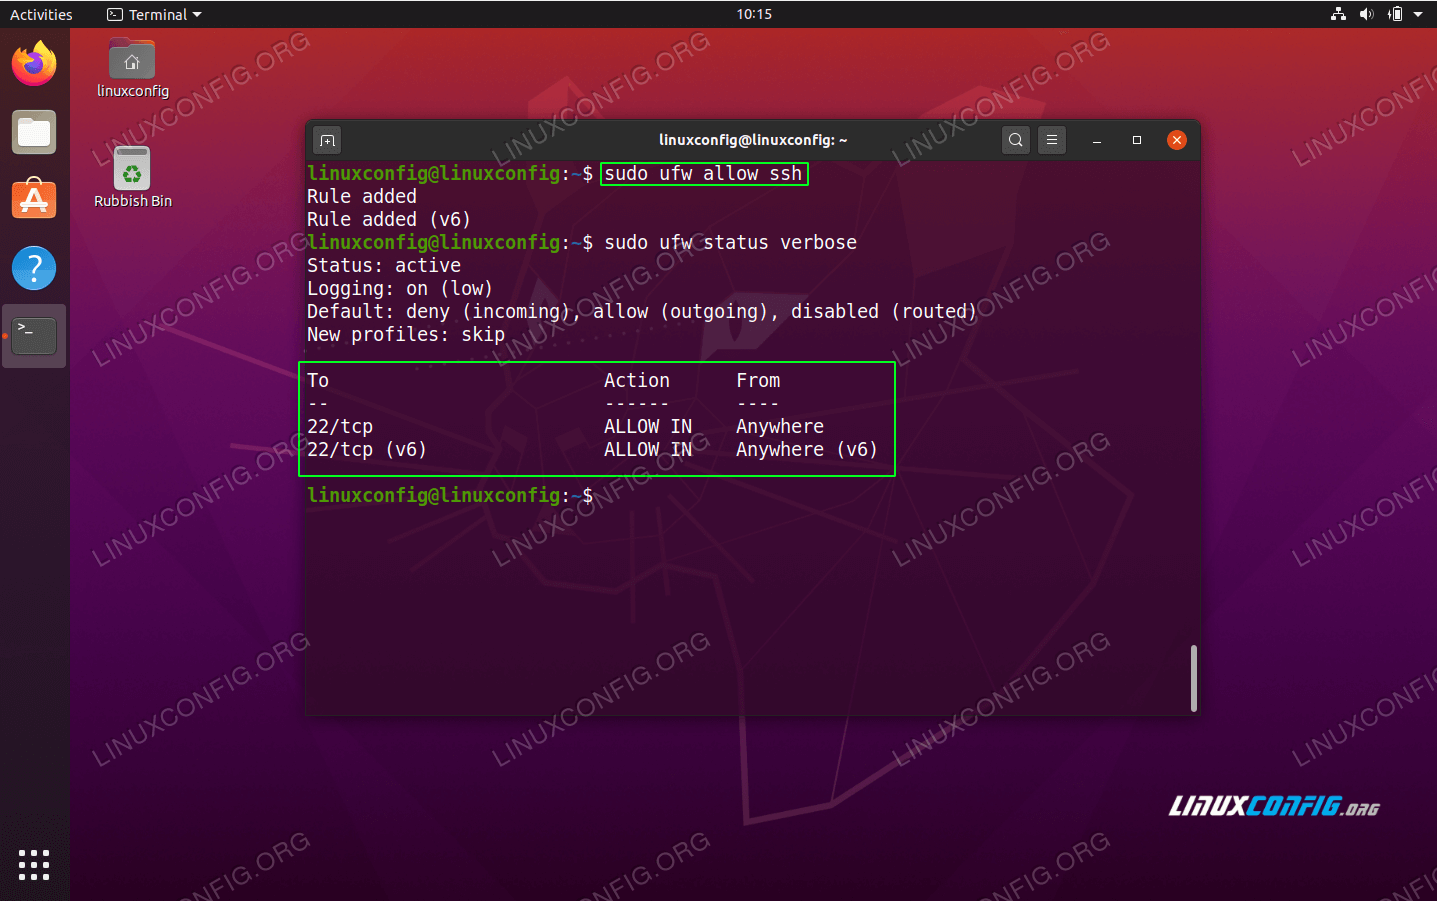
A firewall is like a bouncer at a club. It decides who gets in and who stays out. In your case, you want to allow SSH traffic to pass through while keeping everything else secure.
Solution: Configure Your Router's Firewall
Log into your router's admin panel and look for firewall settings. Add a rule to allow incoming traffic on port 22 (or your custom SSH port). Make sure to whitelist your Raspberry Pi's IP address to avoid exposing your entire network.
Port Forwarding Explained
Port forwarding is the magic that lets you access your Raspberry Pi from outside your local network. Think of it as a tunnel that connects your public IP address to your Pi's local IP.
Setting Up Port Forwarding
- Log into your router's admin interface.
- Find the port forwarding section.
- Create a new rule with the following details:
- External port: 22 (or your custom SSH port)
- Internal IP: Your Raspberry Pi's local IP
- Internal port: 22
- Save the rule and test the connection.
Dealing with Dynamic IP Addresses
Dynamic IP addresses can mess with your remote SSH setup. Here's how to handle them:
Use a Dynamic DNS Service
Services like No-IP or DuckDNS can assign a static domain name to your dynamic IP. This way, even if your IP changes, you can still access your Raspberry Pi using the same domain.
Set Up IP Monitoring
Write a simple script to monitor your IP changes and notify you via email or SMS. This ensures you're always aware of your current public IP.
Security Tips for Remote SSH
Security is key when you're remotely SSH Raspberry Pi behind firewall. Follow these tips to stay safe:
- Use strong, unique passwords or SSH keys for authentication.
- Disable password authentication and rely solely on SSH keys.
- Change the default SSH port to something less obvious.
- Limit access to specific IP addresses if possible.
- Regularly update your software to patch vulnerabilities.
Troubleshooting Common Issues
Even with the best setup, things can go wrong. Here's how to troubleshoot common problems:
Connection Refused
Check if your SSH service is running on both the Raspberry Pi and Ubuntu server. Also, verify your firewall rules and port forwarding settings.
Permission Denied
This usually happens when authentication fails. Double-check your SSH keys and ensure your user has the necessary permissions.
Best Practices for Remote SSH
Here are some best practices to keep your setup running smoothly:
- Regularly back up your Raspberry Pi and Ubuntu server configurations.
- Monitor your logs for any suspicious activity.
- Keep your software and firmware up to date.
- Test your setup periodically to ensure everything is working as expected.
Conclusion
Remotely SSH Raspberry Pi behind firewall on Ubuntu server with port forwarding might sound intimidating at first, but with the right steps, it's entirely achievable. You've learned how to set up SSH, configure your Raspberry Pi and Ubuntu server, deal with firewalls, and secure your connection. Now it's time to put that knowledge into action.
Don't forget to share your experience in the comments below. Did you encounter any challenges? How did you overcome them? And if you found this guide helpful, consider sharing it with your tech-savvy friends. Together, let's make remote access a breeze!


